One of my current favourite open source drawing tools is Inkscape (available from Inkscape.org). I’m planning on giving a talk and/or tutorial about basic Inkscape drawing to the Falkirk Linux Users Group and Edinburgh Linux Users Group at some point over the coming months, so I’m using this space to get my ideas together.
A Bit About Scalable Vector Graphics
Once upon a time, I would have told everyone to use The GIMP for all their graphics needs, but these days I prefer Scalable Vector Graphics (SVGs) and The GIMP is a bitmap editor. SVGs allow me to resize the image without changing the quality of the image. However large or small,the image won’t become pixelated. Most of my drawings are used on business cards or websites so scaling isn’t too much of an issue, but I tend to release my artwork and photos under a Creative Commons Attribution license to anyone else who might want to use them – and they may want to put the image on posters, t-shirts, or billboards!
A Bit About Inkscape
Inkscape is Free (gratis). It’s also open source. It works on Windows, Mac, and also on Linux (which I have on two of my three computers). It’s a fairly lightweight application; outputs images as SVG, PDF, or the bitmap of your choice; and has a fantastically simple user interface. I used Inkscape and it worked beautifully for what I wanted to do, so I kept with it.
I’m not an Adobe Illustrator user – the work I did was never advanced enough to justify the expense of it (a single-seat subscription to Illustrator costs $29/month for a year*). Since I only know about Inkscape, I’ll let other people on the internet explain the functional differences between Inkscape and Adobe Illustrator:
- Squidoo: Inkscape kicks illustrators butt
- Brighthub: Comparing Inkscape and Illustrator: What Are the Real Differences?
- Inkscape Wiki: Inkscape for Adobe Illustrator users
* according to the Adobe website (as of 06 January 2012)
A Bride and Groom as a Scalable Vector Graphic

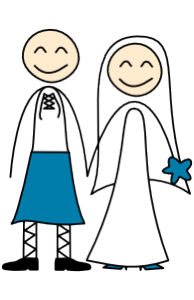
I’ve done a half-dozen logos in Inkscape so far (which you can browse in my publicity portfolio). My most recent artwork was this drawing of a bride and Scottish groom for my wedding invitations.
From the beginning, my partner and I intended to create printed postcards instead of traditional wedding invitation cards. We planned to design them ourselves and get them printed, so off to Google I went in search of inspiration. After a week of looking at thousands of different invitation designs in search of a design that I liked, I found one at weddinginvitations.co.uk.
The image wasn’t quite what I was looking for (not least because my groom will be wearing a kilt) so I thought I’d try my hand at re-drawing it as an SVG. The company who printed our invitation postcards had design guidelines that suggested keeping the image in SVG format to ensure the best printing quality. In addition, I wasn’t entirely sure where we were going to be using the image, other than on the invitations and ‘Thank You’ cards. I could yet decide to put them on minicards to act as nametags on the tables, or make it an image on our wedding website. The flexibility of the SVG format is difficult to argue with.
Basic Inkscape Drawing

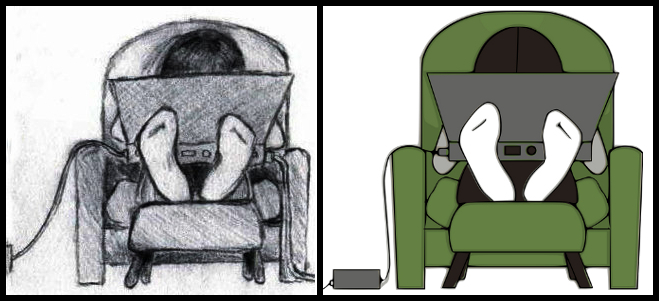
I’d started creating the bride and Scottish groom image in Inkscape by freehand drawing with my Wacom tablet (as I’d done ages ago with a different drawing). After I finished sketching, I selected all the nodes and simplified them (Path > Simplify) to reduce the number of nodes but retain the curves. For example, a freehand line may have 50 nodes, but after simplifying there may only be 5.
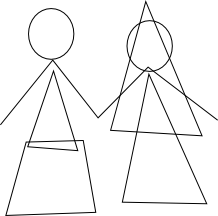
I then realised that the shapes I was ending up with were incredibly simple — so I started over again, but using the bezier tool instead of the freehand tool. If you have a look at this basic shape drawing, you can see that the wedding dress in the image is effectively a triangle and the kilt is only a trapezoid.

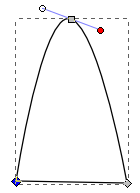
Then it was down to making the lines curve the way I wanted them to. I did this by selecting individual nodes and using the node tools to make the node smooth (making it a curve instead of a sharp angle). When I did that, I also got handles for the node to adjust the direction of the curve. I adjusted the line between two nodes simply by clicking on the line and dragging it where I wanted it.
The whole wedding couple design was done with simple shapes, making making nodes smooth, and dragging lines around. I then did a bit of colouring but all the colours are solid so I didn’t have to worry about getting gradients correct.
The design is not very complicated, but I think its charm is in its simplicity.
A Talk and Tutorial on Inkscape
I’ll post here later about my talk and tutorial on Inkscape for Falkirk LUG and EdLUG. I’ll also be sure to put my notes and/or slides here to share. These are the topics I’m currently planning to cover. If there are any others that you feel need to be mentioned, please get in touch!
- What is an SVG? How does it compare to a bitmap?
- What is Inkscape?
- How do I use the shape tools (square, circle, stars, spirals)?
- How do I change the fill colour, line colour, and line thickness?
- How do I combine and subtract shapes?
- How do I use the freehand and calligraphy tools?
